Monday, April 15, 2024

Still going


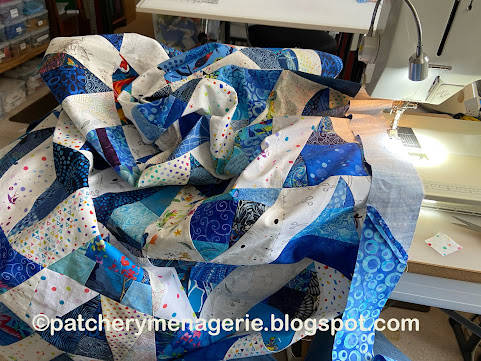
I am quilting this small table runner to show as a sample in the new tutorial. 

I have received comments from some of the people I have designated as my "editors." It is so interesting. Each person notices something different. All the comments I have received and been very good. Some are corrections about my grammar, some are suggestions about better photographs and sometimes I get suggestions to reorder my logic. In each case the suggestions or comments strengthened my overall concept. It's a lot of work, and a lot of thinking. It's challenging, but I know it's worth it.


Way, WAY back in 2008 I made my son a pair of shorts, and I included a band of Seminole patchwork on them. I think they look pretty cool and classic!


Tuesday, April 9, 2024

How Do You Work?

 While I haven't got a specific retirement date in mind yet, it's coming. I've spent the last few months training Ben, a lovely young man, who will be taking over for me. I've pretty much taught him everything. Now I get to watch while he does the work.

We all work in our own way, and there's nothing wrong with that. Except.

In my very first job when I was sixteen, I worked in an office, and my job that summer was to be the backup for when all the gals in the office went on vacation. So I got to do a lot of different things. One day I had to stuff envelopes. But there were like 10 different piles of things to go in each one.

Maggie McConnell asked me "How do you work?" I remember looking at her, not understanding what she was asking.

"I'm left-handed," she said, "So I work different than right-handed people. Do you work left to right or right to left? Arrange your work in a way that works best for you, in a way that makes sense and doesn't waste energy or effort. Try it one way, and if it doesn't work, rearrange it to suit you. There is no right or wrong way. It's whatever works best for you."

It turned out to be the single most important piece of advice I have ever received. When I do retire, it will have been after working over 50 years, and I have used Maggie's advice in every job I have ever had.

After stuffing a couple of envelopes, I moved everything around. I put the envelopes on my left. and I arranged them so when I reached for one, my fingers slipped into the envelope itself - I had folded the flaps UP so they were out of the way. I could reach for the envelope, and open it with my left hand, ready to receive the pile of stuff I had gathered with my right hand. Passing the envelope to my right hand, I tapped the bottom edge of the envelope on the desk, to seat all the items in it to the bottom. I moved the stuffed envelope to the right side of my desk, and then from the right, with my right hand, I gathered the items that had to go in the envelope one at a time. (Yes, I had to stop and fold everything FIRST), and then when the stack was ready, I reached over with my left hand for the envelope, filled it, and began again.

It is, of course, harder to explain than to do.

Maggie's advice also helps me when I teach, because I now WATCH what students are doing.

I am teaching Ben to enter Cash Receipts. Each day we get a list of customer payments that have been made to our bank via ACH. We match the items on that list with the remittance sheets the customers send us indicating how we should apply the funds - which invoices they want paid. We must locate the customer ID number before we can enter the transaction in the system. No problem there. 

After each transaction, Ben makes a check mark next to that item on the bank's list. Ben is right handed. The page he is working from is on his left. The keyboard is directly in front of him. His pen is to the left, sitting on top of the list. After each transaction, Ben reaches for the pen, uncaps it, makes a mark on the page on the left,  recaps the pen and then sets it down. Then he shifts the pages with the data, moving the pen (because it was in the way), and continues to the next transaction.

Can you see where this is going? If not, read the previous paragraph again.

Here is what he did. After the entry, Ben reaches across his body to the left side of his work area, picks up the pen, uncaps the pen, makes the mark, recaps the pen, sets it down, shifts the pages, and moves the pen.   

Every.

Single.

Entry.

It drove me nuts for the first week, and when he didn't notice it, I finally pointed it out to him. He said, "Gee you're right, I don't need the cap on the pen."

The next day I gave him a mechanical pencil.

(One thing at a time.)

When I was drawing I would draw for two to two and a half hours each evening. I liked my pencils super sharp, and hated stopping to sharpen them. I didn't take me long to figure out that I went through a box (a dozen) pencils for each drawing, so I would buy a dozen of my favorite pencils before I began a drawing. I love HB pencils. I'd use H (Hard), HB (Hard Black) and B (Black) pencils. Occasionally I would use a soft 2B (Black, Black)*** pencil, but not often. I would go through a dozen H and HB pencils for each drawing, but the H and 2B, not so much. I kept about four to six of each of them sharp compared to the dozen each of the others. By the way, drawing pencils back then (35 + years ago) sold for about a dollar apiece. Some folks told me that was a huge extravagance.

Well if you've got 36 pencils in a pile near your worktable, you need to be able to tell them apart. By that time I had already developed arthritis in my thumb and I used those triangular pencil gizmos that made the pencil easier to hold by making the grip bigger. (See photo above.) So I color coded them. H pencils had blue grips, HB had red ones. The B pencil had aqua grips and the 2B pencils had purple grips.

But that was just part of it. I also had an electric pencil sharpener. (Remember, arthritis). And since after running the pencils through the pencil sharpener, the tips would get covered in loose graphite, which could  make my drawing dirty, I kept a piece of chamois cloth nearby.

But still.

I figured it out quickly enough ("how do you work?") I kept the pencils on a taboret to the right of my drawing table (I am right handed.) I put the SHARP pencils pointing DOWN. When a pencil I was using got too dull, I would set it back on the taboret pointing UP. Easy to tell at a glance which ones were sharp and which weren't. Easy for me to reach over and grab the pencil I wanted and continue to draw without breaking my concentration. I did not have to shift the pencil in any way. Reach over, pick it up, resume drawing.

By the way, it was by drawing 8 - 10 hours a week that I figured out how many pencils I was likely to go through in one session. I didn't need 24 HB pencils, 12 was sufficient.

At the end of each drawing session, I would set my drawing aside, on an easel, so I could look at it as I walked by the studio (and to keep my cat Gizzy from lying on it. I worked under a strong light, which was also a warm spot. I'd keep a hand towel clamped to the upper left edge of my drawing table. Gizzy liked to nap there when I was drawing. The hand towel was warm and easy to remove to wash when it got too covered with his furs, and it also kept him from sliding down the slippery, angled table, but he'd lie anywhere on that table if I let him and paper is warm, so I moved my drawing.) I would sharpen each of the pencils that were pointing UP, rub the tips across the chamois to remove the excess graphite and position them so they (now nice and sharp,) pointed DOWN.

Incidentally, when my son was in grade school, we set up a smaller drafting table to my left, with a chair a light for my son. Each evening I would go into the studio to draw, and he would sit beside me and do his homework. We spent many happy hours working side by side, and he'd often ask me if I was going to draw that night (as opposed to having to go out to teach) so he'd wait to do his homework when I sat down to draw.

To this day, I still have the pencil grips on my pencils, and even in the tiny portable drawing tin at the left, they are organized this way.

Even in a cup, it is still easy to know which is which.

And this ought to explain why for me happiness is 20 pre-wound bobbins.

So my question to you is, How do YOU work?


*** By the way the Hardness Code of pencils works like this. H = Hard, B = Black. HB = Hard Black. A Number 2 pencil is about like an H. The more letters, the harder or softer a pencil. A 4H was 4 times as Hard as an H. A 2H was twice as hard as an H. Way back before CAD (Computer Aided Design) design engineers used 4H pencils because they could get an extremely fine, sharp line with one. (A disadvantage to the very Hard pencils is that they can also incise a depression in a soft piece of drawing paper. You might be able to erase the mark, but you could not remove the depression.) Conversely the more B's a pencil was, the softer and Black-er it was.  2B was soft, but a 4B was MUCH softer and a 6B was Blacker, and softer still. And of course, the softer the pencil, the more quickly it got dull.


Sunday, April 7, 2024

Seminole sampler


I'm working on the Seminole bands for the new tutorial. I'll sew these into a small wall hanging. I'm pretty sure I've got all my sewing done.

Saturday, April 6, 2024

A New Tutorial in Progress

I'm working on a new tutorial.

It's based on the ideas from Seminole patchwork, which I have always loved.


While these elements certainly can be used in quilts of any size, they can easily be adapted as decorative elements on dresses, skirts, tote bags, pockets, pillows, potholders, table runners and placemats, pants and blouses. The photo above is a small tote bag I used to carry my tools around when I worked in IT. The patchwork above was on the pocket. I figured if I was going to carry a toolbag around all the time it was going to be pretty*.

The rows of on point squares in my sampler quilt, Letters From Home, were made using this technique.

Stay tuned!


*True story: somebody asked me once why I would bother to spend so much time MAKING a small tote bag when I could easily BUY one for much less time and effort. "WHY would I want to spend money on something UGLY," I asked her, "when I can MAKE something BEAUTIFUL?"


Wednesday, April 3, 2024

Quilt in Action

We're supposed to have snow her in New Hampshire today and tomorrow, but it's sunny in California.

This is my DGD with the quilt I made for her as a baby.

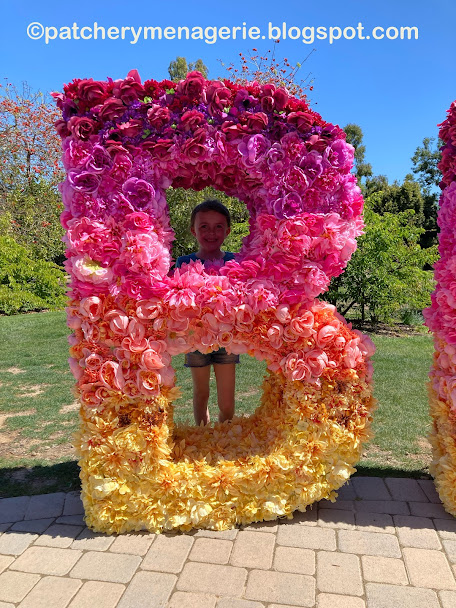
I gift my California family with a membership to the South Botanic Garden each year. These pictures were taken there.

How cool is this?

Then again, this is pretty cool too.  Pink and Green, one of those perfect combinations. Quilt and Granddaughter, nice pair also.


Monday, April 1, 2024

Spring!


Woo hoo! March is over. I have put green pillows and the Greensleeves quilt over the back of the couch.

I put a green quilt on the table, and the fruit in a green bowl on the table.


I also replaced the cover on the little pillow on the red chair.


I have been keeping up with the Covid vaccines, and got the latest one on Saturday. It really knocked me out. I spent most of Sunday sacked out on the couch.

Which was really annoying, because I was looking forward to be a bit more active. In the last couple of months one of my medications changed and I had been wrestling with the side effects. I was exhausted every day. Late last week my doctor and I made a change and I was hoping to get back to "normal."


Sunday, March 31, 2024

Yakkety Yak, squared up

I added extra fabric to the sides of the Yakkety Yak quilt to square it up. I have a tiny bit of tinkering to this and it will be ready to send it to be quilted.


Sunday, March 24, 2024

Let It Rip!

 My least favorite part of making a quilt is getting the backing ready. I don't often use the large 108" wide fabric sold for quilt backings. I bought some for the Awash in a Sea of Blue quilt, but then also bought a panel to fit into the backing.

If you've ever worked with one of these panels you know they aren't square (all corners are 90 degrees) and the sides aren't straight. Look at the right edge of the panel above, you can see how much it bows out.

The first thing I had to do was figure out where the panel would fit in the backing piece, and what size pieces of the background did I need to cut.


Then I had to figure out how to cut the pieces out of the big piece of fabric I had. You would think that a piece of fabric 81" wide by 108" long would be plenty big, but remember this quilt is 66" x 78" and needs an additional 6" all around, so that grows to 78" x 90" Sure that looks big, but I'd need two pieces about 30" x 90" and two more about 24 to 28" by about 36-40". That was going to be a bit fussy.

So the first thing I did was to surround the panel with strips of dark blue fabric. This allowed me to straighten the edges and make it "square." Now that I didn't have to worry about how to adjust the backing, I could move forward.

An aside: If you have ever bought fabric from the Portsmouth Fabric Company, you know they TEAR the fabric, not cut it. This is a shock when you first see (and hear) it, but if you need a 90" long piece of fabric on the straight of the grain 28" wide, it's actually easier to tear than to cut. (Do YOU have a table 90" long?) So the straight edge you see in the photo above was achieved that way. I notched one edge of the fabric and let it rip.


I sewed the chunks to the top and bottom first, then added the long side strips.

TA-DA!

That's done!

One other thing: I did not expect to wake up yesterday to four inches of snow on the ground. On the first day of Spring.


Saturday, March 23, 2024

Backing and Binding for Awash in a Sea of Blue

 The backing and binding fabrics for the blue Scrap Slab Triangle quilt, Awash in a Sea of Blue, have arrived.

This will be the majority of the backing. I had placed this in my shopping cart, and then went hunting for the binding.


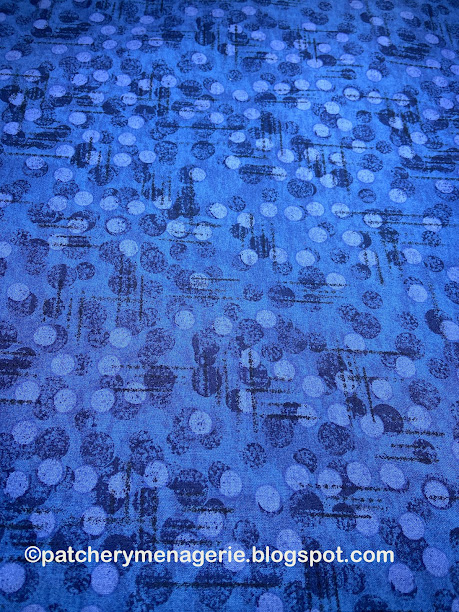
This swirly blue will be the binding fabric. I was ironing it (because you know EVERY SINGLE PIECE OF FABRIC that comes into my house gets a trip through the washer and dryer before I bring it into the studio) and I figured, might as well cut the strips for the binding at the same time. 

I didn't really NEED anything else, but I decided to browse through the online shop. 


I found this lovely panel, and knew I would put it on the back of the quilt. I have hung it up on the design wall on top of the quilt itself, just so you can see how well the two look together. I will surround this panel with the blue fabric in the first photo in this post.

That's my task for tomorrow.


Thursday, March 21, 2024

What I Did Last Night


Look, I know it isn't very exciting, but last night I wound 25 bobbins* with my favorite light gray thread. It's Presencia 60w, and I order it in large spools. 

I know it isn't particularly exciting, but, hey, that's what I did last night.

That and set up my Elsa machine back in the studio. It had been taking a vacation while I sewed up the Awash in a Sea of Blue quilt. The backing fabric is being shipped and I should have it to work on this weekend.


*Yes, I know this is 23 bobbins. One is in the machine and the other is still in the bobbin winding gizmo. And yes, I know I can buy pre-wound bobbins, but that just doesn't seem right to me.

Tuesday, March 19, 2024

Awash In a Sea of Blue


I chose a group of middle-range blues to use as an outer border on the blue quilt. I cut the strips more or less about 20" long, but arranged them in a very specific sequence. I wanted them to flow into one another all around the quilt.


I joined the strips at a 45 degree angle (because I think that looks more interesting) and then start at one corner, sew to the end, square off the edge, turn the corner and keep going.

This is a big chunk of the quilt, so you can see the different fabrics and values of blue in the quilt.

Here is the finished flimsy.

Cherie's comment yesterday pretty much named the quilt - Awash In a Sea of Blue.

Sunday, March 17, 2024

It's a Flimsy!


Each evening I have been assembling a row of blocks. By Friday night I had sewn them all but one.

Then I finished the last row, and sewed the rows together.

Here is the flimsy in a crumpled shot. Julie likes these.

I added a narrow border of some of the light fabrics. My plan is to have a slightly wider border of the medium blues. 

I've already ordered fabric for the backing and binding.

Thursday, March 14, 2024

One Two Three Four...


Sewing the blocks together is a kind of a precise thing. I start at the right side of the quilt, and then place the right side triangle over the blue one, and then set it down. Then I move to the next block, and do the same thing. All the way to the end of the row.

My stack looks like this. Next I pin the two pieces together, keeping the sequence the same. Then I sew them, stack them, and then press them in that same sequence. Then I square them up,

and pin them together (same sequence), being careful not to flip the blocks over.

Then I press them, seams open.

After I have two rows done, I sew them together. Then on to the next two rows. Then I sewed the two two row pieces together into a four row segment. The photo above shows two four row segments sewn together, (at the bottom). I'm working my way through this each evening.

Complicated quilts can be really cool, but there's something lovely and hypnotizing about one block repeated over and over.

In this particular layout, it's very important the blocks line up at the corners so the points match and the blue and white shapes are crisp and distinct.


Monday, March 11, 2024

Blue Arrowheads

I arranged the blue triangles the way I wanted, then added the light side triangles. They are pretty quiet, I know. This quilt has a home already and it is being designed for the future owner - who is a really low-key person.

I've started sewing the blocks together.

I've sewn the bottom four rows of blocks together. It looks a bit weird because there are nine blocks in each of the rows above, but the quilt the quilt really has ten blocks across, so I have been adding a block at the right side of each row.

This particular layout along with the low key light areas, has a very regular, repetitive design which is somewhat soothing. As usual, it looks better when it is sewn up!


This is a scrap slab triangle quilt. You can get the tutorial here at my Etsy shop. It's a great way to use up scraps,